
Travel Photo Book Ideas, Layouts, and Common Mistakes
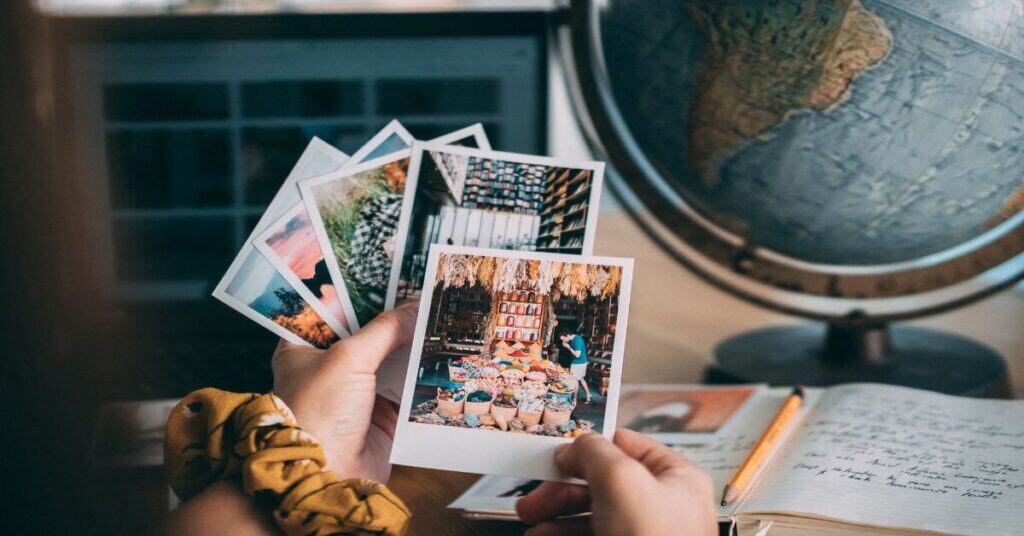
If you are anything like me, you have about 4,000 photos from your last trip and a firm plan to organise them later. Later being, well, never. That is exactly why I love travel photo books, because they turn all those random snaps into something you will actually look at again.
I have made them for years, sometimes for me, sometimes as a gift if I have travelled with someone. One of my favourites was Kenya, and I built it around the adventure bits, safari mornings and whitewater rafting, rather than every single meal and hotel room.
I’m sharing simple ways to keep travel memories, plus my favourite travel photo book ideas, easy layout tips, and the common mistakes that can make a book look messy.
Meet Me In Departures contains affiliate links and is a member of the Amazon Services LLC Associates Program. If you make a purchase using one of these links, we may receive compensation at no extra cost to you. See our Disclosure Policy for more information.
3 Reasons I Love Travel Photo Books
1. My photos stop disappearing into the camera roll abyss
The reality is, most of us take loads of photos, then never properly look at them again.
Putting them into a printed photo book forces me to pick the best moments, ditch the repeats, and keep the trip somewhere I will actually revisit.
2. It turns a trip into a proper story
A good book is not just landmarks and posed smiles. It is the weird little moments, too, like the snack that saved you on a long bus ride, the rain that ruined your hair, or the view you earned after a brutal uphill.
Creating a travel memory book helps me structure the trip so it feels like a real timeline, not just a random photo dump.
3. It is the easiest way to keep travel memories without more clutter
I love a meaningful souvenir, but I do not want drawers full of ticket stubs and bits of paper I will eventually throw away.
A photo book keeps everything in one place, and it is way nicer to flick through than scrolling endlessly on a screen.

Before you Start Designing your Travel Photo Album
If you skip this bit, you usually end up with 80 pages of random snaps and the same landmark from 14 angles. Fun for nobody.
Decide What the Book is in 1 Sentence
This is the quickest way to stop your album from becoming a photo dump. Ask yourself, what is this trip really about?
Try one of these and tweak it:
- My 10-day road trip through Andalucía, told through food stops, day trips, and the places I would go back to
- My Kenya adventure highlights: safari mornings, whitewater rafting, and the messy bits in between
- My ruins trail, one spread per site, plus the small details I would normally forget
Once you have the one-sentence point, choosing photos gets so much easier because you are not trying to include everything.
Choose a Structure, Then Stick to It
Your structure is basically the spine of the book.
Pick one of these, and you will instantly make it feel more like a story.
- Chronological: day-by-day, from arrival to the trip home. Great if you want the whole journey in order.
- By place: One section per city, region, or base. Perfect for road trips or multi-stop itineraries.
- By theme: adventure days, wildlife moments, ruins, street details, food finds, solo wins. This is my favourite when a trip had one main vibe.

Quick tip
Keep your chapters simple.
If you have more than six sections, it usually means you are trying to cram in too much.
Travel Photo Book Ideas: 11 Themes That Actually Work
Whenever I’m putting together a travel photo album, I start with a theme. It sounds a bit serious, but it’s basically the decision that stops you trying to include every single breakfast and 27 near-identical photos of the same doorway.
I’m saying this as someone who’s travelled solo a lot, planned most trips the DIY way, and has made photo books for years, both for myself and as gifts.
I’m also pretty ruthless about keeping things experience-led and ethical. If a moment mattered, it makes the cut. If it’s just a random picture of my hotel room, it can stay in the camera roll where it belongs.
1. The Arrival-to-Goodbye Story
This is the easiest theme if you want your travel photo book to feel like a proper trip, not a random photo dump.
What to include:
- The journey in, the first proper view of the place, and the first meal that made you think, yes, this was a good idea
- A few mid-trip moments, like getting lost, a rainy day, the day trip you still talk about, and the thing you didn’t expect to love
- The last night, the final coffee, the airport, and the slightly tragic unpacking at home
I always include one ordinary photo, like a train ticket in my hand or a snack from a petrol station. Those are the ones that bring the memories back fastest.
2. The One-Place Deep Dive
Perfect for slow travel and anyone who likes to properly get to know a place, not just tick off the highlights.
This works beautifully as a photo album of your trip when the whole point was spending longer in one city or region.
What to include:
- Street scenes at different times of day
- Favourite local spots you kept returning to
- A page of details: menus, tiles, door knockers, market stalls, signs
- A simple page of practical notes: where you stayed and the area you’d choose again
3. The Adventure Highlights Reel
This is the theme I used for my Kenya book. I didn’t want a standard holiday photo book where everything looked calm and tidy, because the trip wasn’t calm or tidy.
It was early starts, dusty drives, adrenaline, and the kind of tired that makes you fall asleep covered in dust from a day’s safari.
What to include:
- The big experiences: safari drives, rafting, hikes, diving, canyoning, whatever your trip was built around
- The build-up: gear, the starting point, the nerves, the briefing
- The aftermath: muddy shoes, windblown hair, celebratory snacks, and the look of I cannot believe I did that
Layout Tip
Give each main experience a hero page. It instantly makes your travel memory book feel more high-end.
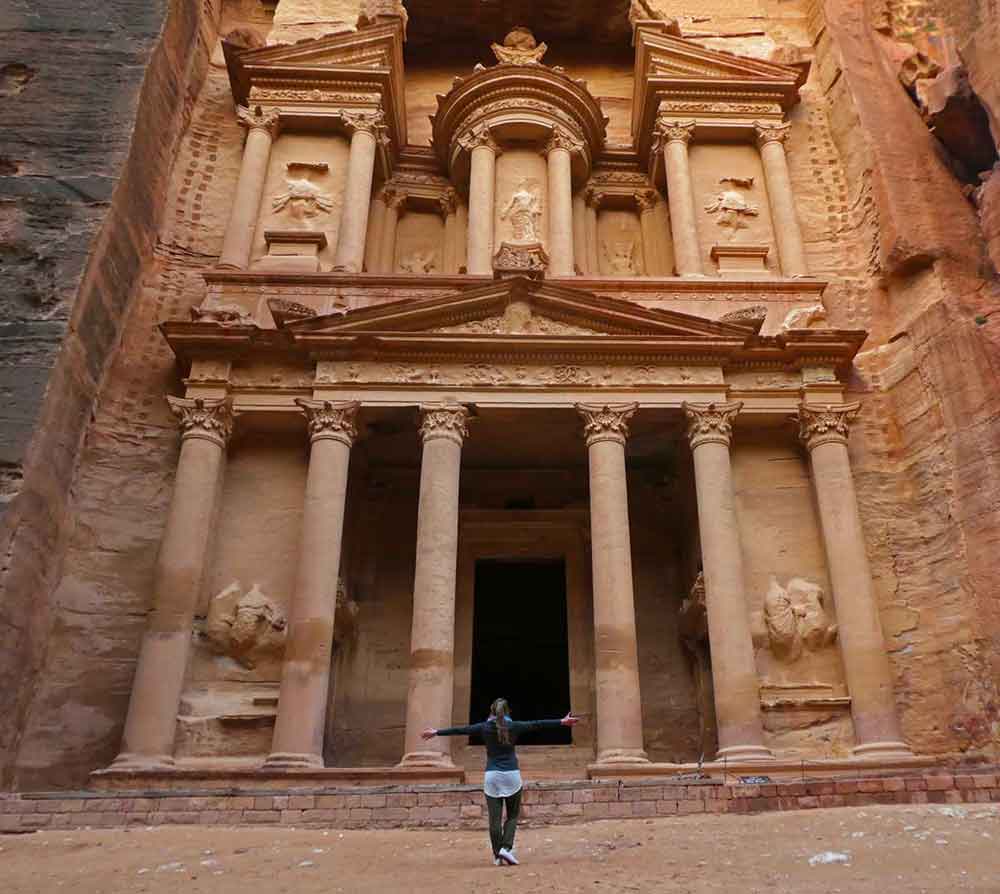
4. The Ruins and Ancient Sites Trail
This is my personal weakness, and if you’ve followed my blog for a while, you’ll know I’m a sucker for ancient ruins.
If you’ve planned a trip around ruins, temples, amphitheatres, tombs, or old cities, this theme makes your printed travel album feel intentional straight away, as it has a nostalgic Indiana Jones feel to it.
What to include:
- One spread per site with one big photo and 2–3 detail shots
- A tiny caption: where it is, and a sentence on what made it worth the effort
- A page of details: carvings, mosaics, columns, patterns, inscriptions
Try This
I always add a photo that shows scale, like me walking in, a gate, or the path leading up. It’s the difference between looks pretty, and I remember exactly how that felt.
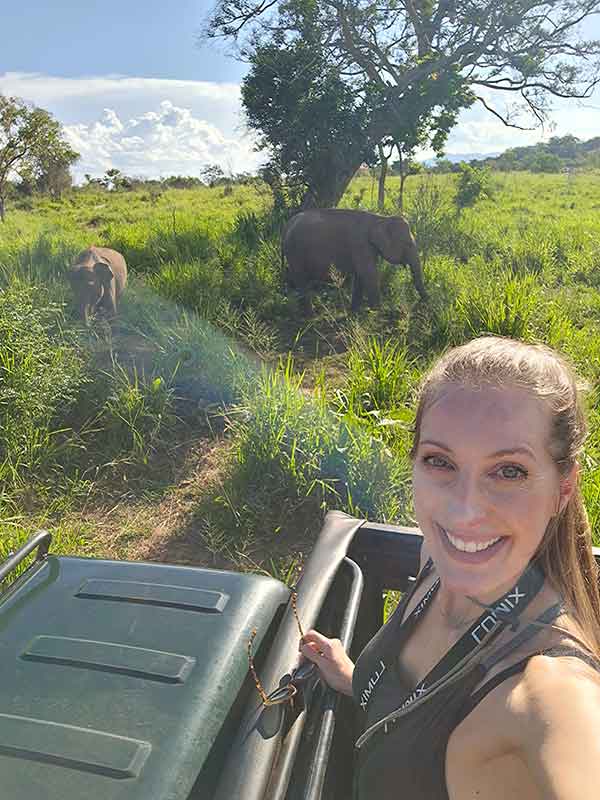
5. The Wildlife Moments Book
If you love animals, this becomes a proper travel keepsake book because it’s not just nice photos, it’s a record of rare sightings and early mornings you definitely earned.
What to include:
- Wildlife shots plus the context: landscapes, tracks, boats, hides, sunrise starts
- A sightings list at the back, like a mini diary
- A page on ethical choices: keeping distance, following rules, choosing operators that don’t harass animals

Ethical Travel Tip
If you’re making a digital version of your photo book (or even uploading images to Instagram), it’s worth adding a line about responsible viewing. Readers trust you more when you show you care about how experiences happen, and you’re not just doing it for the photo souvenir.
6. The Food I Actually Ate Theme
Not a fancy food photography project. A real one. Especially useful for vegetarian travellers, because it helps you remember what to order again and what to avoid next time.
What to include:
- One page per place: best meal, best snack, best drink, and the thing you would happily skip forever
- Markets, supermarkets, picnic moments, train snacks
- Menus, chalkboards, plates in your lap, all the real-life stuff
Fun Formatting
This topic works brilliantly in a travel scrapbook style book layout because you can do quick captions and small collages using napkins, menus or food wrappers you picked up along the way.
7. The Street Details and Textures Book
This is my favourite theme when I want something that looks artsy without trying too hard. It’s also ideal if you don’t have loads of posed photos.
This theme looks amazing in a travel photo album with plenty of white space to show off the images.
What to include:
- Doors, tiles, street signs, textiles, shop fronts, balconies, patterns
- Close-ups of hands holding tickets, coffee cups, maps
- A few wider street scenes, so it doesn’t feel too similar
8. The Solo Travel Confidence Book
This one is for my solo travellers, especially women. It’s not about looking perfect. It’s about remembering the moments you were brave, independent, and quietly proud of yourself.
Solo trips give you a different set of memories than couple or group trips.
What to include:
- The small wins: navigating a station, ordering in a new language, doing a day trip alone
- The comfort moments: your favourite café, your go-to route, the place you went back to twice
- The photos that remind you that you can do hard things, even if you were tired and slightly cranky at the time
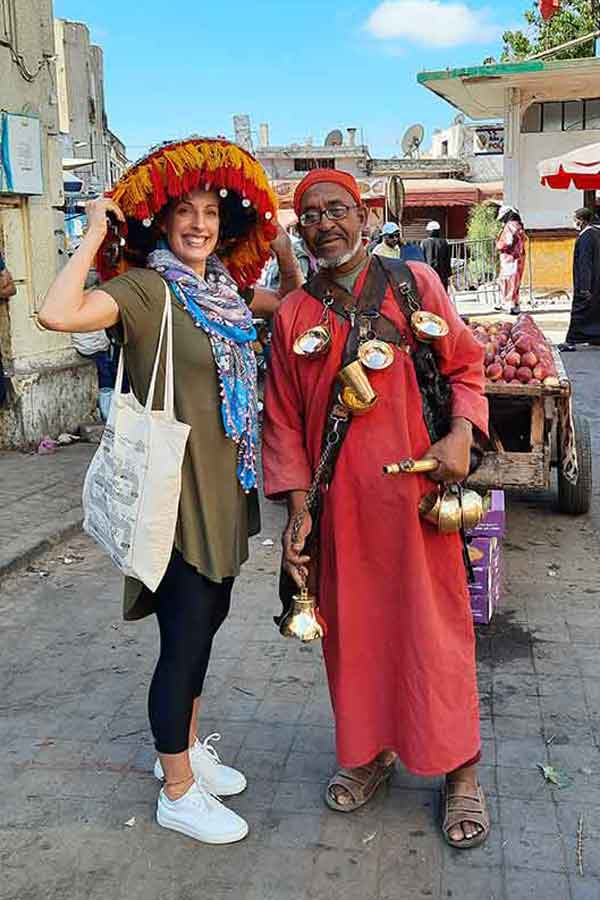
9. The People and Connections Story
This is perfect if you travelled with a friend, met people along the way, or had natural interactions with locals. It also makes a lovely travel memory book gift.
What to include:
- Photos of you together doing normal stuff, not just posed ones
- The moments that show personality: laughing, exhausted, sunburnt, triumphant
- The shared highlights: best day, most chaotic day, interesting locals
10. The 5 Senses Trip Story
This is a great way to make your travel picture book feel different from every other album you’ve made, without needing fancy design skills.
How to do it:
- Sight: favourite scene
- Sound: street music, waves, call to prayer, forest noise
- Smell: spice markets, sea air, rain on warm pavement
- Taste: the best bite you had
- Touch: sand, cold stone, humidity, wind, sweaty hike feeling
11) The Transport and Getting-Around Diary
This is ideal for independent travellers because transport is genuinely half the story. It also makes your trip photo album feel more real and more useful to look back on.
What to include:
- Trains, buses, ferries, road trip shots, station signs, route maps
- Views from the window, seat numbers, snacks, delays, the silly stuff
- A page of notes: what was easy, what was annoying, and what you’d do differently next time
Trouble Deciding a Theme?
If you’re stuck choosing, go with the theme that makes you instantly remember how the trip felt. The whole point is to end up with a printed travel album you actually want to open, not a project that lives unfinished on your laptop forever.
Layout Tips That Make a Photo Book Look Pro
You do not need to be a designer to make a photo book look really good.
You just need a few simple rules and the self-control to not put 9 photos on every page because you cannot choose. I say that with love, because I have absolutely done it.
1. Use a Small Set of Repeating Layouts
This is the fastest way to make the whole book look intentional. Pick 4–6 layouts and keep reusing them, so the pages feel consistent.
Here’s a simple set I use all the time:
- Hero page: 1 photo full page, no clutter
- 2-photo spread: 1 photo on each side, great for before-and-after moments
- 3-photo row: perfect for markets, food, street scenes, or a quick timeline
- 4-photo grid: best for details, textures, and little moments
- Caption page: 1 photo plus a short caption, ideal for context or a funny memory
Practical tip
Once you choose your set, build the whole book with those layouts first, then go back and swap a few pages to keep it from feeling too samey. That stops you from getting perfectionist paralysis and stuck on page 7 forever.
2. Give Your Photos Breathing Space
White space is what separates a polished photo book from something that looks like you made it at 1 am after 2 glasses of wine.
It makes your best photos stand out, and it stops the book from feeling visually exhausting.
A rule I use:
- If the photo is strong, make it bigger
- If the moment needs explaining, use fewer photos and add a short caption
- If you have 6 good photos from the same place, spread them over 2–3 pages instead of cramming them into 1
Also, try to mix wide shots and close-ups. If every page is a wide landscape, it starts to blur together. If every page is a close-up, you lose a sense of place.
3. Use Full-Page Spreads, But Avoid the Gutter Trap
Full-page spreads are amazing for landscapes, skylines, big ruins, or that one safari shot where everything finally lined up.
The mistake is putting anything important right in the middle where the book folds.
I learned this the annoying way, after sacrificing a perfectly good photo to the gutter.
Do this instead:
- Use spreads for photos where the middle is not the main focus
- Keep faces, animals, and important details away from the centre fold
- If you really want a specific photo big, use it as a full page rather than a spread
4. Keep Fonts and Captions Simple
Captions are what make a book feel personal.
They also become the thing you are grateful for later, because future you will forget the name of that tiny village or what that snack actually was.
My caption formula is simple:
- Where: place name
- What: 3–8 words on what’s happening
- Why it mattered: 1 short line, only if it adds something
Examples:
- Seville, Tuesday night, the tapas bar I went back to 3 times
- Kenya, day 4, the morning we finally saw elephants up close
- Granada, 1 pm, I got lost and accidentally found my favourite street
Keep it consistent, too.
Pick one font, stick to it, and do not get tempted by decorative fonts that look fun for about 3 minutes and then make your book hard to read.
5. Create Pacing, Not a Photo Dump
This is the bit that makes a book feel like a story. Think of it like a playlist; you want a mix of big moments and quieter ones.
A simple rhythm that works:
- 1 hero page
- 1 grid or row page
- 1 caption page
- repeat
Then, every few sections, add something that changes the pace:
- A map page
- A ticket or menu photo with a short note
- A funny moment that breaks up the perfect shots
6. Do a Final Quality Check Before you Call it Done
This is the unglamorous part, but it saves you from regrets.
Before you finish, quickly check:
- No blurry photos slipped in
- Horizons are straight
- Nothing important is too close to the edges
- Captions are consistent, and spellings are right
- You have a mix of people, places, details, and wider scenes
If you want the book to feel extra polished, add a simple opening page with the destination and dates, then a quick closing page with your top 5 moments. It makes it feel complete, like a proper finished thing, not just a set of photos you printed.
Common Mistakes to Avoid
Most photo books don’t go wrong because the photos are bad.
They go wrong because we get excited, rush it, and suddenly we’ve created a chaotic scrapbook monster. Been there.
- Trying to include everything
If you are fighting to squeeze 300 photos into 40 pages, it is not going to look good. Pick highlights, break it into simple chapters, and let the best moments have space. - Using low-resolution photos or social media downloads
Screenshots and Instagram saves look fine on your phone, then turn into sad, fuzzy blobs in print. Use the original files from your phone or camera whenever you can. - Ignoring bleed and safe margins
Anything too close to the edge can get trimmed, and it is always the bit you cared about most. Keep text and important details away from the edges, and treat the outer border like a danger zone. - Putting faces or text too close to the gutter
The middle fold will swallow things. It just will. Shift key details inward, and avoid centring faces across a two-page spread unless you want a very dramatic nose crease. - Using too many fonts, colours, and extra bits
It is tempting to make every page different, but it usually makes the whole book look messy. Stick to a single font, and then 1–2 accent colours, and keep the design simple. - Giving zero context
Future you will forget what that tiny street was called or why that random bowl of noodles was such a big deal. Add tiny captions, a simple map page, or a quick trip stats box with dates, route, and your top 5 moments.
My Simple Workflow
I do this the same way every time because it stops me from getting stuck in perfection mode.
The goal is not to create a museum masterpiece. It’s to actually finish the thing.
Step 1: The 3-folder method
Create 3 folders (or 3 albums if you’re on your phone):
- Maybe: anything that might make the cut
- Yes: photos you genuinely like
- Book finalists: the ones you would be annoyed to lose
Step 2: The 3-pass edit
This is where the magic happens, because it turns chaos into a story.
- Pass 1: Delete the obvious rubbish
Blurry shots, accidental screenshots, six versions of the same photo where your face slowly slips into despair. - Pass 2: Pick the story photos
These are the photos that explain the trip, not just the pretty ones. Think transport, street scenes, people, food, and those in-between moments. - Pass 3: Pick the hero shots
Your absolute best photos, the ones you want big on the page. If you only had space for 20 photos, these would be them.
Step 3: A Realistic Timing Plan
Here’s the exact schedule I use when I want this done in a weekend.
If you want an extra-easy win, do the first 2 steps on a weeknight, then save the designing for a weekend morning when your brain is less fried.
| Task | Time |
| Choose your theme + simple chapters | 1 hour |
| Shortlist photos into Book finalists | 2–3 hours |
| Design the pages using repeating layouts | 2–4 hours |
| Final check: spelling, margins, repeats, blurry shots | 30 mins |
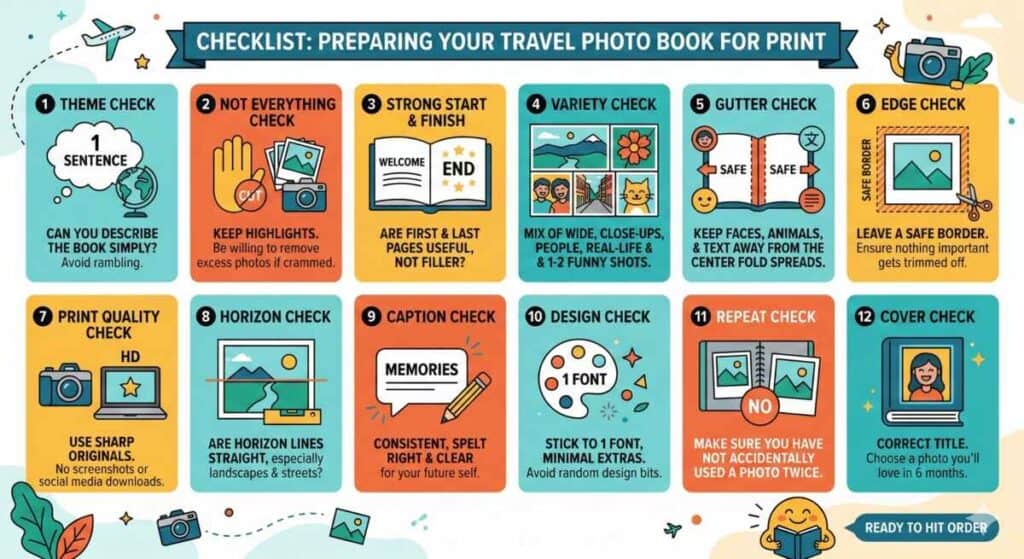
Quick Checklist Before You Hit Order
- Theme check: Can you describe the book in one sentence without rambling?
- Not everything check: Are you keeping it to highlights, and willing to cut 10–20 photos if it feels crammed?
- Strong start and finish: Are your first and last pages doing something useful, rather than filler?
- Variety check: Do you have a mix of wide scenes, close-up details, people, everyday moments, and 1–2 funny real-life shots?
- Gutter check: Are faces, animals, and text safely away from the centre fold on spreads?
- Edge check: Have you left a safe border so nothing important gets trimmed off?
- Print quality check: Are you using sharp originals, not screenshots or social media downloads?
- Horizon check: Are your main horizon lines straight, especially in landscapes and street shots?
- Caption check: Are captions consistent, spelt right, and clear enough that future you will understand them?
- Design check: Are you sticking to one font and minimal extras, instead of throwing in random bits?
- Repeat check: Have you made sure you have not accidentally used the same photo twice?
- Cover check: Is the cover title correct, and is it a photo you will still like looking at in 6 months?
That’s Your Travel Photo Album Sorted, Here’s Your Next Step
Your travel photo album does not need more thinking about. It needs 1 hour and a shortlist.
Pick a theme from this post, set a timer for 1 hour, and move your best photos into a final folder. Once that’s done, the rest is just layouts and a bit of tweaking, not a life decision.
If you want more ideas for keeping trips memorable once you’re home, start with these other great ways to keep travel memories:
- How to start a travel journal when you hate writing
- The travel memory box: what I keep and what I throw away
- How I organise travel photos so I can actually find them later
- Travel souvenirs that are actually worth bringing home